Diberdayakan oleh Blogger.
RSS

CORN CHEESE PARATHA | EASY PARATHA RECIPES

Sweet-corn+cheese +paratha
Corn and cheese is always a winning combo and i already posted corn cheese balls recipe but this corn cheese paratha i gave for Kungumam Thozi magazine. It got published in first week of March. Parathas will be in the lunch box menu of kids every week. Mostly i make aloo paratha or gobi paratha for them. When i made this one day for dinner both my kids loved it and requested to make the same for the lunch box too the next day. Liking a same dish by both kids is not easy at my home. I think moms with 2 grown up kids will vouch for it. Try this easy paratha recipe at home and i am sure your teenage kid or the little one will enjoy this corn cheese paratha.


Corn cheese paratha

  Preparation Time : 10 mins | Cooking Time : 30 Mins |Makes: 5

    Sweet corn   1 (if using frozen take 1/2 cup)
    Whole wheat flour|atta     1 cup
    Grated cheese ( i used mozzarella)   1/2 cup
    Milagai thool     3/4 tsp
    Chaat masala      2 pinches
    Salt    to  taste
    Oil| butter    to cook the parathas 
     
     
corn-cheese -paratha
Method:
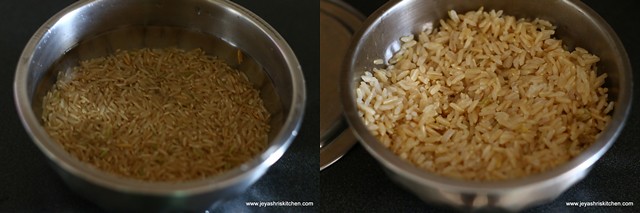
  • Cook the corn till soft and take out the corn kernels. You can use frozen corn too. If using frozen corn, just thaw this and cook in water for 5 minutes and drain the water completely.
  • Pat dry them.
  • Just pulse this in a mixie once.
grind-corn
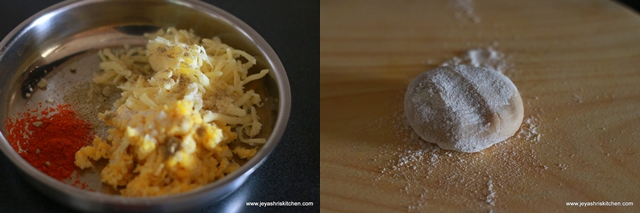
  • Add this to a wide bowl, add red chili powder, chaat masala, salt and cheese.
  • Mix well.
  • Take a lemon sized ball of chapathi dough. 
filling-for paratha
  • Roll this into a small disc and place a tblsp of filling in the center and cover the dough.
corn-cheese-paratha
  • Roll this into a paratha either thick or thin. Heat tawa on put the paratha on this.
roll-the parathas
  • Cook till golden brown on both sides. Add little oil or butter to this when it becomes golden brown on both sides.
corn-cheese paratha
  • Parathas are ready to serve. You can completely cool this and pack for your kids lunch box too.
corn-cheese paratha
Notes:

  1. You can add finely chopped capsicum or grated carrots too while making the filling.
  2. Garam masala can be replaced with chaat masala.
  3. Oregano and red chili flakes can also be replaced with red chili powder and chaat masala to give a pizza flavour to the paratha.
  

  • Digg
  • Del.icio.us
  • StumbleUpon
  • Reddit
  • RSS

KUTHIRAIVALI MURUNGA KEERAI ADAI | MILLET RECIPES

Barnyard milet- adai
Kuthiraivali | Barnyard millet adai i tried for the first time few months back when i was making supplement book for Mangayar malar themed "Millet recipes". Murungakeerai | Drumstick leaves we generally make poriyal. My mom adds this to adai and we all are a great fan of murunga keerai adai. We have a murunga maram at our backyard from where we get fresh leaves and fresh drumstick (organic too) whenever we want. Even in the entire street they take drumstick leaves from our house. And during the drumstick season, amma will give drumsticks to all the friends as we get most and more of drumstick from the tree. Whenever i cook murngakeerai i have memories of my childhood related to it. I will be the person who will go to the terrace and pluck the fresh leaves from the tree for the adai or poriyal.
  Kuthiraivali adai with murunga keerai was a  wonderful combo and i had this for breakfast today with a glass of neer mor too. You can have adai with aviyal too.

Kuthiraivali adai 

  Preparation Time : 15 + 2 hours soaking | Cooking Time : 5 mins per adai  |Makes: 5-6

     Kuthiraivali arisi | Barnyard millet   1/2 cup
     Channa dal       1/4 cup
     Toor dal      1/4  cup
     Poha | Aval    1 tblsp
     Red chili    2-3 
    Asafoetida   a pinch
    Shallots | small onion    7-8 (sliced)
    Murunga keerai |drumstick leaves   one hand ful
    Salt     as needed   
     
  
Millet-adai +drumstick leaves

Method:
  • Soak the kuthiraivali millet and poha together . In another bowl soak the channa dal and toor together. Soak this for 2 hours.
  • Meanwhile slice the onions and keep it for adai just before grinding.
  • Grind the rice and poha together into a fine paste.
grind-millet
  • Grind the toor dal, channa dal and red chili together into a coarse paste. Add asafoetida and salt.
 grind-dal
  • Mix both the ground mixture together. Add the shallots and drumstick leaves. No need to cut the leaves. Add as it is.  Mix well . No need to ferment. Batter is ready for adai.
millet-adai maavu
  • Heat a pan and when it is hot pour in a ladle full of batter and spread this into thick adais. Make a hole in the center and drizzle oil around the adai. 
  • Cook on both sides till it becomes golden brown.
  • Cook in a medium flame only.
kuthiravali-adai
  • Adai is ready to serve.
  • You can have this as it is without any chutney or molaga podi. If needed you can have with jaggery | vellam.
 kuthiraivali -adai
Notes:

  1. Adding poha will give softness to the adai.
  2. You can add 1 tblsp of urad dal to the dal mixture to give more softness to the adai.
  3. Big onions can also be added to this , but small onions enhances the taste.

  • Digg
  • Del.icio.us
  • StumbleUpon
  • Reddit
  • RSS

VAZHAITHANDU MOR | NEER MOR WITH BANANA STEM

vazhaithandu-mor
Summer has started and many parts of India it is in peak. To beat the heat, we need to hydrate ourself with loads of water, cucumber and fresh fruits. Buttermilk | Neer mor is a best summer cooler and to make it more tasty i have already posted Neermor and Masala chaas recipe here. Last month  when i went  to India, my sister after making morkootu with vazhaithandu, made this vazhaithandu mor for all of us. We had this after a heavy breakfast, and it tasted very nice. Later after coming back here, i tried this few times and i can say i am addicted to this. You could never know that Vazhaithandu is added in this butter milk. Enjoy summer with this healthy drink.

Vazhaithandu Mor

  Preparation Time : 15 mins | Cooking Time : Nil |Serves: 2-3

     Vazhaithandu      1/4 cup (chopped)
     Green chili        a very small portion
     Yogurt |curd    1/2cup
      Water     1 to 1 and 1/2 cup
      Ginger   a small piece
      Curry leaves    few
      Oil    few drops
      Mustard  little
      Asafoetida | hing   a pinch      


Vazhaithandu butter milk
Method:
  • Grind the chopped vazhaithandu | banana stem along with green chili, ginger and curry leaves in a mixer. Add little water while grinding.
vazhaithandu mor
  • Churn the yogurt | curd and add enough water.
  • Filter this using a strainer. Add little water while filtering this. Discard the fiber and add the vazhai thandu juice to the churned butter milk.
vazhaithandu -mor
  • Temper mustard seeds and asafoetida in little oil and add this to the churned butter milk.
vazhaithandu mor
  • Chil this in the refrigerator and consume this when ever you want.
  • I will post more interesting butter milk recipes in the following weeks.
Neer-mor - banana stem
Notes:
  1. Do not add more green chili as it will make it spicy.
  2. Add little coriander leaves if you want.

  • Digg
  • Del.icio.us
  • StumbleUpon
  • Reddit
  • RSS

PUNJABI SAMOSA RECIPE | PUNJABI ALOO SAMOSA WITH VIDEO

samosa recipe
Punjabi samosa, the name it makes us to salivate for us. I have already posted a triangle samosa recipe but making this punjabi samosa was my dream. A friend in our apartment used to make this everyday and gives them to the nearby shop . If we order with her in advance she will make for us too. I tasted it once in a party, but got many good feed backs from my friends who regularly buy from her. I asked her one day can you teach me how to make the shapes of punjabi aloo samosa. She immediately said whenever you want you come. So one fine evening i went to her house and learnt the shaping of samosa. She patiently explained me and cleared my silly doubts too. Even before making this yesterday and send few doubts over whats app messages and she explained to me. Here you go, i finally made the punjabi samosa and given the recipe with step wise pictures and video of shaping the samosa too. It needs practice and also not very difficult as we think. do try this at home, as home made ones are always the best. Waiting to hear from you.
Check the video below as how to shape the samosa.


Punjabi Samosa 

  Preparation Time : 20 mins + 1 hr resting time | Cooking Time : 40 Mins |Makes: 12

     For the outer cover  
 All purpose flour | Maida     1 cup
 Sooji|rava     1 tblsp
 Oil          3 tblsp
 Salt        to taste
 Ajwain | omam   1/4 tsp

   For the filling 
 Potato      3 medium size
 Red chili powder     1/2 tsp
 Coriander seeds     1/4 tsp
 Jeera powder     1/4 tsp
 Amchoor powder    1/4 tsp
 Ajwain       1/4 tsp
 cumin seeds      a pinch
 Salt    to taste
 Garam masala      2 pinches
 Oil       2 tsp
Oil       to deep fry    
     

Punjabi-aloo samosa
Method:
  • First let's make the dough as it needs to rest for an hour.
  • In a wide bowl add the flour, sooji, salt and ajwain seeds.
  • Add the oil too.
dough for samosa

  • Mix it well till the flour becomes crumble.  If you  could hold the flour in your hands it should hold into a shape. You can add ghee too instead of oil.
  • Add little water and make it into a smooth dough.
punjabi-samosa
  • Cover this properly and keep it aside for an hour.
Now lets make the filling:
  • Boil the potatoes in a pressure cooker till 3-4 whistles. Take out the skin and mash the potatoes nicely.
  • In a pan add oil and add in the jeera and ajwain. Coarsely pound the coriander seeds and keep it aside.
  • Add in the mashed potatoes.
add-mashed potato
  • Add in the red chili powder, amchoor powder, garam masala and coarsely pound coriander seeds. If you want u can coarsely pound cumin seeds and peanuts too. I added cumin powder.
  • If u want you can add cashew nuts too. Since we are frying the samosa you can add it as it is. No need to fry the cashews.
  • Cook this for few minutes and mix well nicely. Switch off the flame. Samosa filling is ready.
punjabi-samosa filling

Lets make the shaping of samosa.
  • Take a medium lemon sized dough and roll this into a oblong shape thin roti.
  • Cut this diagonally using a sharp knife. 
punjabi-samosa
  • Take one portion and apply little water on one end of it as shown in the picture.
  • Bring both the edges backwards and make a cone shape.
how -to shape- samosa
  • Make a cone shape by sealing both the edges. Be careful to seal it properly ,else it will break in oil.
shaping-samosa
  • Place 1 tblsp of potato filling into this . 
punjabi potato samosa
  • Apply water on the edges of the outer  cover. Bring both sides together.
potato filling
  • If needed you can fold the edge and bring it together as shown in the picture below.
how to make shape samosa
  • Samosas are ready. Repeat this same procedure for rest of the dough. For the filling was perfect for the dough, a small piece of dough i discarded since i don't have filling.
punjabi+samosa
  • Heat the oil for deep frying.
  • When it is hot bring it to medium heat and put 2-4 samosas at a time, depends on the size of the pan.
  • Do not over crowd the pan.
  • Deep fry on both sides till golden brown.
  • Drain excess oil in a Kitchen towel.
deep fried - samosa
Punjabi+ samosa
Notes:
  1. Resting time for the dough is must to make the outer crust crispy and smooth while shaping them.
  2. Adding onions and peas to the masala is purely of your choice. 
  3. Go ahead and make any type of masala you want to fill.
  4. While sealing ensure it is sealed properly. Else it may break into the oil while frying and make a mess.
  5. Always keep the made samosa covered till you fry them.
  6. If you want to fry the next day, you can do this too. After making put them in big ziplock bags and keep it in the freezer. 
  7. You can take it out from the freezer and fry it the next day. No need to thaw it for a long time.


  • Digg
  • Del.icio.us
  • StumbleUpon
  • Reddit
  • RSS

BROWN RICE PULAO | EASY VEGETABLE PULAO

brown rice- pulao
  Brown rice recipe i posted yesterday, and as told posting the recipe of easy vegetable pulao using brown rice. It tasted very nice and even kids too loved it. Now i am super excited to make recipes using brown rice . As brown rice is very good for health, we can slowly shift to brown rice based recipes.


Brown rice pulao

  Preparation Time : 15 mins | Cooking Time : 35 Mins |Serves: 1-2

     Mixed Vegetables*    1/4 cup
     Oil       2 tsp
     Brown Rice      1/2 cup
     Ginger garlic paste   1/2 tsp
     Green Chili   1
     Cinnamon stick   a small piece
     Cardamom    1
     Star Anise   1
     Salt    to taste
     Coriander leaves   to garnish
     * i used carrot, broccoli and capsicum
     

Brown rice-pulao
Method:
  • Cook the brown rice according to the instructions given in this post of how to cook brown rice.
  • In a pan add oil and add the whole masalas like cinnamon, cardamom and star anise and green chili too.  Add in the ginger garlic paste. Cook in a low flame till the raw smell goes.
  • Add the vegetables now and cook for 2 minutes. Let them be crunchy. Do not over cook.
brown rice-pulao
  • Now add the cooked brown rice and mix gently. Garnish with coriander leaves, 
brown-rice pulao
  • Serve it with any raita. You can pack this for lunch box too.
brown rice- pulao
Notes:
  1. Any veggies of your choice can be added. 
  2. Always ensure it should be crunchy.
  3. You can add onions while adding the whole masala. Always cook the onions till it turns pink.

  • Digg
  • Del.icio.us
  • StumbleUpon
  • Reddit
  • RSS

HOW TO COOK BROWN RICE| BROWN RICE IN PRESSURE COOKER

brown-rice in pressure cooker
This post on how to cook brown rice is a long due for me. I got the brown price from the fair price shop here last month itself but somehow couldn't try it. As my mom always say, the auspicious time to cook that hasn't come yet . lol.!!. Finally i cooked it yesterday and wanted to post the recipe yesterday itself. But it was too busy yesterday and i couldn't sit and write a post on it. I made the brown rice in pressure cooker. As we Indians are highly dependent on pressure cookers, and without the whistle of it our mornings will never be complete.There are so many varieties of brown rice available in market and basically each one takes it own time to cook. I have used 2 varieties of brown rice so far and both were extremely different. So unlike normal white rice, i can't give exact measurement but few tips may give you an idea of how to cook brown rice. The water quantity i have given is for the brand i used. It consumed very less water whereas the one i used last time consumed more water.
   Brown rice are high in fibre, it promotes weight loss too. It is good for diabetic people too And also helps to lower cholesterol too


How to cook Brown rice

  Preparation Time : 15 mins | Cooking Time : 25 Mins |Serves: 2

     Brown rice    1/2 cup
     Water   3/4 cup      
      Salt    little to taste   

brown-rice
Method:
  • Wash the rice and soak it in water for 15 minutes. how to cook rice
  • Place the rice in a vessel and add salt. Cover it with a plate.
  • Pressure cook this till 8-9 whistles.
  • Fluff it up with a fork.brown -rice
  • Brown Rice is ready . The texture of brown rice will always be chewy.
  • You can many recipes with brown rice, I will be posting a brown rice pulao recipe in few hours . Stay tuned.
How-to cook-brown rice
Notes:
  1. Soaking the rice makes cooking of brown rice easy.
  2. The more you soak the softer rice you get.
  3. Always keep the flame medium low while cooking in pressure cooker.
  4. If cooking on open pan, add 1 cup of water and allow this to boil. 
  5. Then add the rice and cook. Add few drops of oil if needed.

  • Digg
  • Del.icio.us
  • StumbleUpon
  • Reddit
  • RSS

ATTA NAN KHATAI RECIPE |WHOLE WHEAT NANKHATTAI

happy holi
Nan khatai is a Indian style short bread cookies. I have already posted the recipe of Nan khatai , also posted a version of saffron laced nankhatais too. Though i already posted 2 sweet recipes for holi, since today is holi festival i thought i will post some thing colourful. Suddenly thought of this atta nan khatai which i have bookmarked from Divya's space long back. I made this and added few drops of food colour to the dough to make it colourful.Wish you all a very Happy Holi.
The original recipe used only whole wheat flour for making nakhattai.


Atta Nan Khatai

  Preparation Time : 10 mins | Cooking Time : 15 Mins |Makes: 8 large cookies

     Whole wheat flour     1/2 cup
      All purpose flour     1/4 cup
      Semolina | rava | sooji   1/4 cup
      Melted Ghee      1/4 cup
      Powdered sugar    1/4 cup
      Baking soda    a pinch
      Food colours - any 5 colors of your choice - a pinch-2-3 drops
      Cardamom powder     a pinch   
      Milk    1-2 tblsp  (if needed)   
        

whole wheat - nankhatais
Method:
  • In a wide bowl, add the whole wheat flour, maida, sooji, powdered sugar, cardamom and baking soda.
  • If the rava is not very fine, just powder it once in a mixer.
  • Add the melted ghee to this.
dough for atta nan khattai
  • Mix this into a smooth dough. sprinkle little milk if needed.
  • Divide the dough into 5 equal parts and sprinkle the food colour to each of the dough and mix them evenly.
color-dough
  • Now bring all dough together and make a big ball. Knead it again well and make a ball.
  • Take a small potion of this and make desired shapes. I did with a cookie cutter.
atta-nankhattai
  • Preheat the oven at 160 degrees. Arrange the nan khattais in a greased tray and bake it for 15 to 20 minutes . 
baked cookies
  • Nan khatais are ready. Store this in a airtight box and enjoy the cookies.
atta- nan khattai
Notes:
  • If it is slightly soft when soft after taking out from the oven, do not worry, it will become crispy when it is completely cool.
  • But if you still feel it is soft after cooling down baking it for 5 more minutes.

  • Digg
  • Del.icio.us
  • StumbleUpon
  • Reddit
  • RSS