Diberdayakan oleh Blogger.
RSS

TANDOORI GOBI | CAULIFLOWER RECIPES | EASY STARTER RECIPES

 Baked and Tawa method

Tandoori-gobi
Tandoori Gobi is a very easy starter recipe which i recently saw in TV show, but i have never tasted this Tandoori Gobi. Last weekend, i ordered  this easy starter recipe in a restaurant . Though we all liked the taste it was very spicy. On the way back, i bought one pack of cauliflower to try this at home following the recipe. I tweaked the recipe slightly, according to my preference.
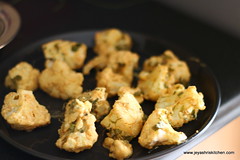
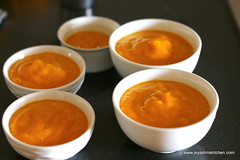
This tandoori gobi, turned out very well and we all happily enjoyed this vegetarian starter.


Ingredients
Tandoori Gobi

  Preparation Time : 20 mins | Cooking Time : 30 Mins |    Serves: 2-3

   Cauliflower    1 medium
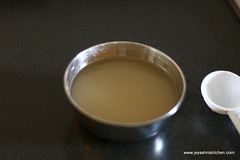
   Yogurt     1/2 cup
    Red chilli powder  1/2 tsp
    Jeera powder    1/4 tsp
    Coriander powder   1/4 tsp
    Garam Masala   2 pinches
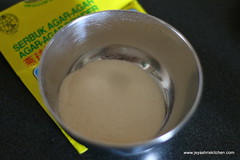
    Besan |kadalai maavu   1 tblsp
    Chaat Masala  1/4 tsp
    Kasoori methi   a Pinch
    Oil    2 tsp     


Tandoori-gobi
Method:
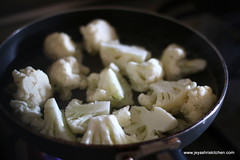
  • Cut the cauliflower florets into big.  Put them in hot water and take it out in 2 minutes and drain the water. Hung the yogurt for 15 minutes to take out the excess water. You can also replace yogurt with sour cream too.
blanch-gobicauliflower-blanced
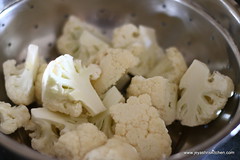
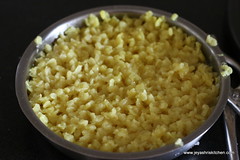
  • Put the blanched cauliflower in a wide bowl. Roast the besan in a low flame for 5 minutes.
  • Add to the cauliflower.
besanblanched-gobi
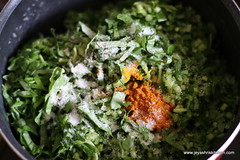
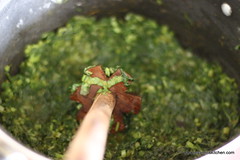
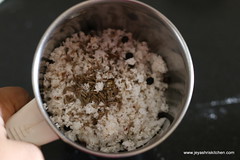
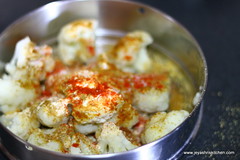
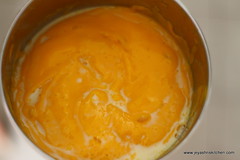
  • Add the red chilli powder, hund curd, salt, garam masala, cumin seed powder, coriander powder and kasoori methi. 
  • Mix well and keep it in the refrigerator for marination. Let this sit for 20 minutes.
marinationTandoori-gobi
  • If you are baking grease a baking tray with little oil.
  • Spread the cauliflower  florets in the baking tray and bake for 35 minutes or till they become golden brown. Turn the florets in between.
  • I tried it on the tawa method too. Both turned out very well.
  • If using the tawa method, add few drops of oil on the pan, preferably a non stick pan.
  • place the cauliflower florets on the tawa and slowly roast them till they turn golden brown. Turn the florets in between to get even browning.
  • Always keep the flame low, else the florets will get burnt.
baked-tandoori-gobitandoori-gobi
  • Sprinkle chaat masala just before serving.
easy-starter-recipes
Note:

  • You can replace yogurt with sour cream available in the super market.
  • You can also add tandoori masala for marination.
  • This can be done in microwave too. Keep the marinated florets on a microwave safe bowl and cook till golden brown.

  • Digg
  • Del.icio.us
  • StumbleUpon
  • Reddit
  • RSS

MAAVADU RECIPE | VADU MANGO PICKLE | PICKLE RECIPES

pickle-recipes

Vadu mangai or maavadu , generally we get in summer season and i remember accompanying my mom to the central market in my town, to buy the tender mangoes . We make pickle out this vadu mangai . My mom always buy this vadu manga in bulk (10 padi) and she makes pickle in big jars and share with my athais who are all big fan of vadu manga pickle. Though i am not a big fan of maavadu i enjoy seeing this procedure of making maavadu. I love the maavadu water very much, a perfect combo for Curd rice. Make this easy maavadu pickle this summer and enjoy them with curd rice.


Ingredients
Maavadu

  Preparation Time : 20 mins | Cooking Time : Nil |   Yields : 2 cups

     Raw tender mango | Maavadu  1 Cup
     Castor oil      1/2 tsp
     Rock Salt  3/4 tsp
     Mustard seeds  1/4 tsp
     Red Chilli  10
     Asafoetida  1/4 tsp
     Red chilli powder  1/4 tsp


Maa-vadu

Method:
  • Select small tender mangoes from the market and wash them in water nicely. Wash it few times to get rid of the dirt in the mangoes and pat dry them well.
  • Ensure that no water is there, else fungus will form after the pickle is made. My mom puts the wiped mangoes under the sunlight for half an hour.inside the home near the window. I also did the same.
maavadumaavadu
  • Take the mangoes and put them in a clean dry bowl and add castor oil to this and rub the mangoes with oil , and ensure all the mangoes are coated well with oil.
  • The addition of castor oil is to reduce the heat caused by mangoes.
Maavadu
  • Grind the red chilli, mustard, rock salt, red chilli powder and asafoetida into a fine paste. You can add little water while grinding.
MaavaduMaavadu
  • Add this to the mangoes and mix well with a clean dry spoon.
Maavadumavadu
  • Keep this covered and put in a dry place for a week. 
  • Everyday morning mix the mangoes well . Do not worry if the water is less. It will ooze out water in a week's time.
  • And the mangoes will start shrinking too.
Maavadu

  • After 10 days transfer it to a clean dry bottle and put it in the refrigerator.
  • If handled well, maavadu will stay good even for a year.
  • Generally , we don't store this in the refrigerator. Even outside in a porcelain jar this will stay good. 

  Vadu-manga-pickle
Note:

  • Always add clean water for grinding the ingredients. Do not use normal tap water. Use drinking water.
  • Keep the pickle in a clean dry container. even if little water is there , the pickle will be spoiled.
  • Use dry spoon to take out the maavadu, everytime.

  • Digg
  • Del.icio.us
  • StumbleUpon
  • Reddit
  • RSS

COOKING FOR GUESTS SERIES #20 |CHAAT RECIPES | EVENING SNACK MENU


Posting chaat recipes in cooking for guests series is my daughter's idea. Actually i made this for my kids as a snack when they came back from school. I made in small quantities and they finished all of them in few minutes . Generally they take some tiffin or variety rice  for lunch box and after coming back from school, they usually have full meal with rice, dal, curry and yogurt. So this will be filling for them as most of the days they go for some classes in the evening. If they have some snacks , both of them will feel hungry around 6 pm. But this snack was very filling for them and your guests can sure be pleased with this chaat menu for snack. They can easily have a light dinner after this filling chaat.
By the time i finished making, the kids reached home and i took the pictures in hurry.

chaat-recipes
The menu i have made was:
Have a great weekend with this interesting chaat recipes, and have fun with  your guests.
Planning to start a new series from next week on another interesting series . wish you all join me in that interesting series too and give a great response as always.

  • Digg
  • Del.icio.us
  • StumbleUpon
  • Reddit
  • RSS

MANGO PUDDING RECIPE | EGGLESS MANGO PUDDING RECIPE| MANGO RECIPES

mango-pudding2

Mango season started in full swing. My first order from Ministry of Mangoz has arrived last week. the alphonso mangoes were very tasty and they are organic too. We are really enjoying the mangoes and side by side i am trying out some mango recipes too. Mango pudding i wanted to make last year itself but some how missed it out during the mango season. I made this 2 days back and we all really enjoyed this mango pudding. I made this with agar-agar as i wanted to make the  vegetarian version of mango pudding.


Ingredients
Mango Pudding

  Preparation Time : 20 mins+setting time 3 hours | Cooking Time : 3 Mins|   Yields : 3 cups


   Ripe Mango  2 (i used alphonso)
   Agar agar powder   1tblsp
  Water     1/2 cup
  Milk    1 Cup
  Sugar   2-3 tblsp
   

mango-pudding1

Method:
  • Peel the skin of the mangoes and slice them roughly. 
  • In a blender add the mango slices, sugar and milk. Add sugar according to the sweetness of the mango. Mine was very sweet.
alphonso mangomango+sugar+milk
  • Add agar agar powder in half cup of water and keep in a low flame. It will get dissolved.
agar-agardissolve agar-agar
  • Grind the milk, mango and sugar into a fine paste.
  • When the agar agar mixture is warm add this to the mango milk mixture.
  • Mix well.
milk+mango+sugaradd-agar agar
  • Pour them into bowls and cover this with a cling wrap.
  • Set this in the refrigerator for 3 hours.
set
  • Serve them chilled . Garnish with mango slices before serving.
  • You can also add chocolate shavings for garnishing. 
mango-pudding3

Note:
  1. Always ensure that the agar agar powder is fully dissolved.
  2. Else the pudding will not set.
  3. Use rich colour mango to get nice yellow colour pudding.
  4. You can add fresh cream while grinding the mango pulp to get a rich texture.


  • Digg
  • Del.icio.us
  • StumbleUpon
  • Reddit
  • RSS

METHI KHAKHRA RECIPE | METHI KHAKRA RECIPE

Methi-Khakra
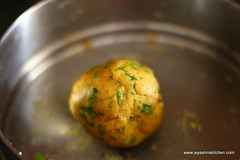
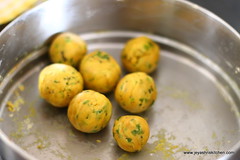
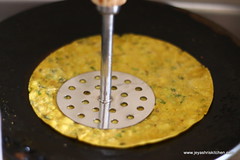
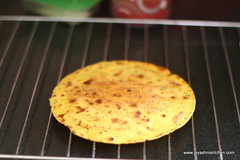
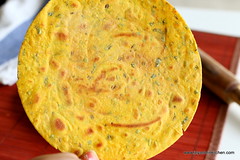
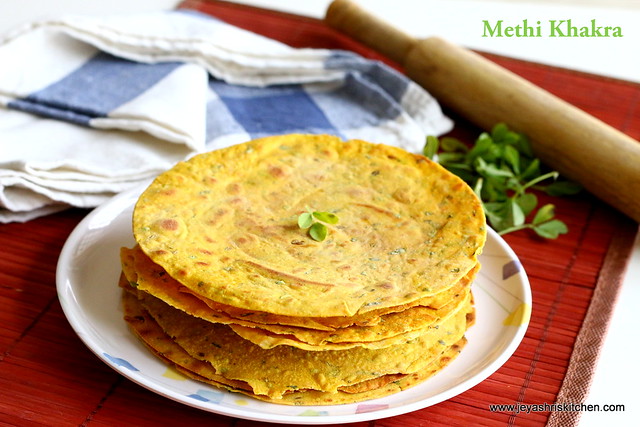
Khakhra | khakra is a crispy flat bread , originally a Gujarathi savoury snack. Few years back, when we are travelling to Delhi from Chennai, in train, i saw few people eating this khakras for breakfast. That was the first time i was introduced to this snack. Later i tasted it few times but never attempted at home.
 Last week one of my friend posted a picture of khakra in facebook and i had a fresh bunch of methi leaves at home too. So i wanted to try out this khakras and clarified few doubts with my friend. It was so easy to make at home and quite healthy as it is made with Wheat flour. It is bit time consuming but very much worth the effort. Try out this super healthy and easy tea time snack - Methi Khakra. Even if you are travelling you can make this and take as this will stay good for a week.

Ingredients
Methi Khakra

  Preparation Time : 20 mins | Cooking Time :20 Mins|   Yields : 7


    Whole wheat flour  1/2 Cup
    Fresh Methi leaves   2 Tblsp*
    Red Chilli powder   1/4 tsp
    Ajwain | omam   a pinch
   Turmeric powder   1/4 tsp
   Cumin seeds|Jeera  a pinch
    Oil   1 tblsp
   Salt  as needed
*You can add kasoori methi too.

Methi-Khakra

  • Add all ingredients in a wide bowl and add little water to make it into a stiff yet pliable dough. 
  • Keep it covered for 15 minutes.
flourdough
  • Make the dough into equal sized balls.
  • Dust with flour and roll the ball into a very thin roti. The rolling should be very very thin as a paper.
  • Dust with flour when needed. 
doughrolling
  • Heat the tawa and place the roti on the tawa. 
  • Keep the flame low. When bubbles start coming up, using a potato masher or a clean cloth press the roti nicely, without allowing the air bubbles to pop up.
  • Do this on both sides. ensure that the flame is low. So that you get crispy khakras.
pressingcrispy-khakras
  • Cool them completely and store them in air tight containers. This will stay crisp for many days. Mine got over in a week.
cooling-downMethi-Khakra
  • Enjoy crispy khakras with hot tea of can have with any subzi for breakfast too.
  • Always handle this with clean dry hands.
  • Ensure that the flame is kept low while cooking.
  • Also the rolled roti should be very thin.

Methi-Khakra

  • Digg
  • Del.icio.us
  • StumbleUpon
  • Reddit
  • RSS

KEERAI KOOTU RECIPE | KOOTU RECIPES

keerai-kootu

Any variety of kootu is loved by all of us at home. Evn my son who sometimes won't eat some veggies, if i make in the form of kootu, he will have it without any complaints. Keerai kootu i made it almost once or twice a week and among all kootu recipes, this one with keerai|spinach we like a lot. My mom makes this with manathakkali keerai , which we grow in our garden. I still love the freshness of the kootu she makes with home grown keerai. This kootu recipe is very easy to make and very healthy too. Check out my Keerai Masiyal and Keerai poriyal.
keerai-kootu


Ingredients
Keerai Kootu

  Preparation Time : 10 mins | Cooking Time : 25 |   Serves :


     Keerai | Spinach*  - 2 bunch (around 4.5 cups)
    Sambar powder  - 1 and 1/2 tsp
    Salt    As needed
    Asafoetida  2 pinches 
    Sugar    1/4 tsp 
    Turmeric powder  1/4 tsp
    Yellow moong dal (un cooked) - 1/4 cup
    Coconut   2 tblsp
    Jeera | cumin seeds  1/2 tsp
    Black pepper  1/4 tsp
   Coconut oil   1 tsp    
* I used the round spinach , you can use arai keerai or mulai keerai or even manathakkali keerai

Method:
  • Wash the spinach 4-5 times as they have small sands . Chop them finely.
  • Add sambar powder, salt,asafoetida, sugar and turmeric powder.
keeraikeerai
  • Add 1/2 cup of water and cook for 5-7 minutes . Let the raw smell of the sambar powder go and the keerai gets cooked. The keerai will get cooked very fast as they are finely chopped.
  • Pressure cook the moong dal with enough water.
keerai-cookingmoong dal
  • Grind the coconut , jeera, and pepper into a fine paste. Add little water if needed while grinding. do not add more.
coconutground -coconut
  • Add the cooked dal and the ground paste too.
  • Mix well and let this boil for 5 minutes . 
  • Switch it off.
coconut-mixkootu

  • Temper mustard seeds and urad dal in coconut oil.
  • Serve hot with plain rice or as a side dish for Vathal kuzhambhu.
keerai-kootu

Note:

  • If you feel the kootu is bit watery, mix 1 tsp of rice flour and little  water and add in the last and boil for 5 more minutes.

  • Digg
  • Del.icio.us
  • StumbleUpon
  • Reddit
  • RSS