Diberdayakan oleh Blogger.
RSS

INSTANT TIFFIN SAMBAR RECIPE| SIDE DISH FOR IDLI|DOSA

SAMBAR WITHOUT DAL

  I have already posted the recipe of Tiffin sambar , but  few weeks ago when i went for an outing with my friends the topic of instant sambar came. Suddenly i remembered that i have tried an instant sambar long back from Rohini’s space. But since i forgot that recipe i searched in her blog again and made the instant tiffin sambar again and enjoyed with idlis . After a break rohini has started blogging again and for the original recipe click here.
instant tiffin sambar
CARROT 1/2
TOMATO 2
SHALLOTS(SMALL ONIONS) 4-5
TAMARIND EXTRACT 3 TBLSP
CORIANDER SEEDS 1 TBLSP
RED CHILLI 2
POTTUKADALAI | CHUTNEY DAL|ROASTED GRAM 2 TBLSP
OIL 2 TSP
MUSTARD SEEDS 1/4 TSP
WATER AS NEEDED
SALT AS NEEDED
TURMERIC POWDER 1/4 TSP
CURRY LEAVES | CORIANDER LEAVES FEW
INSTANT SAMBAR
METHOD:
  • Chop the tomatoes and carrots and  peel the skin of the shallots.
IMG_8667
  • In a pan, add a tsp of oil and roast the coriander seeds(dhania),red chilli and 2-3 shallots.
  • When it turns brown add half portion  of the chopped tomatoes and saute in a medium flame till the tomatoes becomes soft.
IMG_8664 IMG_8671
  • Allow it to cool and and grind it into a smooth paste adding the pottukadalai (roasted gram)to it.
IMG_8666 IMG_8676
  • In a pan, add oil and throw in the mustard seeds and when it splutters add in the remaining shallots and when they are slightly brown add the remaining half of the chopped tomatoes.
  • Now add the carrots and saute for a minute and add the tamarind extract and add 2 cups of water. Add salt and turmeric powder.
IMG_8673 IMG_8675
  • Allow it to boil for few minutes till the carrot becomes soft.
  • Add the ground spice mix to it and before adding the ground masala dilute it with 1/2 cup of water.
IMG_8681
  • Allow this to boil and garnish with curry leaves and coriander leaves.
  • If you find the sambar is thick just add water to dilute it and bring it to a boil.
  • Serve it hot with Idli | dosa | pongal.
instant tiffin sambar

  • Digg
  • Del.icio.us
  • StumbleUpon
  • Reddit
  • RSS

PARRUPU URUNDAI KUZHAMBHU | URUNDAI KULAMBHU

Parrupu Urundai Kuzhambhu, my mom makes during our childhood days, but i never used to eat it and she makes rasam for me but my sister used to love it like anything. Even after marriage in my in laws place they never used to make it but i remember once my mil made this with morkuzhambhu. When i wanted to make this last week, I asked my mom for the recipe and i tried it and somehow i enjoyed it and told my mom that i liked the paruppu urundai kulambhu very much.

urundai kuzhambhu


INGREDIENTS:

FOR URUNDAIS:(YIELDS 10 SMALL BALLS)

TOOR DHAL 1/4 CUP
CHANNA DAL 1 TBLSP
RED CHILLI 2
SHALLOTS(SMALL ONION) 6-7(OPTIONAL)
SALT AS NEEDED
ASFOETIDA A GENEROUS PINCH

FOR THE GRAVY

TAMARIND EXTRACT(THIN EXTRACT) 3 CUPS
SAMBAR POWDER 2 TSP
SALT AS NEEDED
TURMERIC POWDER 1/4 TSP
ASAFOETIDA A PINCH
SESAME OIL 1 TBLSP
MUSTARD SEEDS 1/4 TSP
CURRY LEAVES FEW
urundai kuzhambhu

Method:

  • Wash and soak the dals together for 45 minutes.
  • Drain the water completely and grind it into a slightly coarse paste by adding red chilli , salt and asafoetida to this.
  • Peel the skin of the shallots (if using)and finely chop them and mix it to the ground dal mix.
IMG_8448 IMG_8456
  • Grease your hands and make small tight balls.
  • Grease the idli plate and arrange the urundais on it and steam it for 12 to 15 minutes on medium flame.
  • Insert a tooth pick to check out whether it is done.
IMG_8461 IMG_8465

  • In a pan, add sesame oil and throw in the mustard seeds and when it splutters add the tamarind extract and add the turmeric powder, salt,sambar powder ,curry leaves and asafoetida.

IMG_8463

  • When it starts boiling simmer the flame and add the steamed paruppu urundais carefully to the boiling gravy one by one.
IMG_8466 IMG_8467

  • Let this boil till it reaches a kulambhu (gravy) consistency.
  • It should be slightly thicker than the sambar.

IMG_8469-001

  • Serve with hot rice. Normally we mix  the gravy with hot rice and keep he urundais as accompaniment.
  • We had with avarakkai(broad beans) curry and Vazhakkai chips.


urundai kuzhambhu

Note:

  • Adding onions is totally optional. My mom told adding onions makes it soft.
  • Some people add fennel seeds while grinding ,but since i don’t like it much i didn’t add.
  • You  also add a tsp of cumin seed while grinding.
  • Some people may add coconut to the gravy, if you want to add just grind 2-3 tblsp of coconut with little water and add it to the gravy in the last.
  • Always ensure that the balls should be tight and while grinding do not add water. If it is loose they may tend to break after putting it into the gravy.


  • Digg
  • Del.icio.us
  • StumbleUpon
  • Reddit
  • RSS

HOW TO MAKE SOFT IDLIS | IDLI BATTER RECIPE


IDLI RECIPE

I have been thinking to post the recipe of how to make Soft idlis for a long time. But after coming to Singapore, I have stopped following the traditional method of grinding the Idli batter . First of all the quality of Urad dal which we get here is will be not be so good and  only a few shops will sell good quality of Urad dals. Many times we buy few packets of Urad dal from India , but that will also last for few months only. Whereas in India i used to grind a big batch of Idli batter every week and i make super soft spongy idlis.
When i was casually talking to a friend she suggested to add a handful of poha and while soaking and that method gave me soft Idlis. But again soaking urad dal  and Idli rice separately and grinding them separately is a boring thing for me as the quantity. So i started with my own method of soaking urad dal, idli rice and poha (aval) together and grind them smoothly. This turned out to super hit and resulted in spongy idlis.  Still many of my North Indian friends here are asking me to cater Idli and sambar during parties !!. But as i have so many other priorities and commitments i never agreed for that. Due to a constant request from them to post the Recipe of Idli batter I am posting this today. This method is so easy for everyone who grind in small quantities.
Don’t forget to follow the tips which i have mentioned at the end of the post.
Idli
INGREDIENTS:
IDLI RICE 4 CUPS
URAD DAL 1 CUP
RICE FLAKE |POHA|  AVAL A FISTFUL
WATER AS NEEDED
SALT AS NEEDED
IDLY
METHOD:
  • Wash and rice , urad dal and poha several times and soak them in enough water for 4 hours. Even soaking overnight is also ok, but 4 hours is more than enough.
IMG_8630
  • After 4 hours drain the water and add the soaked rice, urad dal and poha into the wet grinder. Do not discard the water. You can use it for grinding.
  • Grind this into a smooth batter adding water in regular intervals.
  • Adding water is so important as this will help in bringing out soft idlis .
  • It took approximately 2 to 3 cups of water to grind this batter.
  • The entire of process of grinding took 30 minutes.
IMG_8633 IMG_8640
  • The consistency after grinding should not be so thick. Add salt and mix it nicely with your hands or a spatula.
IMG_8646 IMG_8647
  • Keep it in a container and allow it to ferment for 8 to 10 hours.
  • The fermentation time depends on the outside temperature as if it is very hot you get it fermented soon, whereas in rainy season this will take extra 2 hours.
  • My usually says it depends on the body heat of the person who grinds the batter and mix salt using hands.
  • Normally i soak for idli in the evening around 5 0 clock and grind at 9 pm.
  • I allow it to sit overnight and make idlis for next day breakfast.
before fermentation after fermentation
  • Before making the idlis in the morning mix the batter nicely using a ladle.
IMG_8683
  • If you are not going to make idlis after fermentation just keep it refrigerated to avoid over fermentation ,resulting in sour idlis.
  • For making idlis, grease the Idli plate  with oil(preferably sesame oil) . Heat the Idli pan with 1 cup of water and allow the water to boil.
  • Pour 3/4 the ladle of idli batter to the idli plates and steam it for 8-9 minutes.
IMG_8684 IMG_8685
  • If you want to check out whether it is done, just wet your finger and insert it in a idli and it is not sticky just switch off the flame and take the idli plate out .
  • After a few seconds dip a spoon in water and carefully take out the idlis and transfer them to the serving plate. Do not take out when the idlis are hot as it will not come out properly.
IMG_8686 IMG_8687
  • These idlis will stay soft for many hours and never get dried. Just cover it properly if you going to eat it later.
  • We had with red chutney, coconut chutney and Sambar.
Idli
  • This method is so convenient for working women who wants to spend more time with family and kids as this method will consumes  comparatively less time to grind the batter.
Note:
  • Once you have finished grinding take out the batter container out. Never keep it near the hot motor of the grinder as it will not give soft idlis and will change the color of the idlis too.
grinder
  • Always grind with enough water . If the batter is thick and after fermentation even if you add water to make it into a right consistency, it will not result in soft idlis.
  • The proper aeration should be there and the batter should be light and fluffy after fermentation.
  • If making dosa just add few tablespoon of water and make crispy dosas.
  • If you stay in a cold place just keep the batter inside a cup board or microwave oven(switched off) to get good fermentation.
  • Always transfer the ground batter to a big container as the quantity will double after fermentation.
  • Instead of poha some people may add cooked rice too, but somehow my mom and mil will not agree to it  as they do not eat left over cooked rice.
  • Do not add more poha as it will result in flat idlis.
  • If you get super good quality of urad dal then skip adding poha and follow the same procedure.
  • Keeping the soaked rice urad dal and poha mix in the refrigerator for an hour before grinding and use the cold water for grinding. this will help to reduce the motor heat.
Hope i have covered all the points but if you have any doubts feel free to ask me.
DISCLAIMER: This recipe is not the traditional method of making idli batter but a short cut and simple method which i adopt to make batter.

  • Digg
  • Del.icio.us
  • StumbleUpon
  • Reddit
  • RSS

VAZHAKKAI CHIPS RECIPE| HOME MADE RAW BANANA CHIPS

   Vazhakkai | Raw banana chips is a rare one which i make at home, though my grandmother makes a super crispy chips often. One day i had a sudden craving for this chips and i decided to make it out and asked my mom for the exact procedure of making it(though i know roughly). The raw banana chips came out super crispy and yum and we enjoyed with hot rice and Paruppu urundai kuzhambhu for a weekend lunch. Will be posting the recipe for parrupu urundai kuzhambhu in my next post.
raw banana chips
INGREDIENTS:
RAW BANANA | VAZHAKKAI 2
OIL TO DEEP FRY
SALT AS NEEDED
BLACK PEPPER POWDER 1/4 TSP
RED CHILLI POWDER 1/8 TSP
PLANTAIN CHIPS
METHOD:
  • Peel the skin of the  raw bananas and slice them using a slicer (mandoline slicer)and immerse it in salt water for 10 minutes.
IMG_7692
  • After 10 minutes, take out the slices and pat dry in a kitchen towel.
  • On the other hand heat the oil for deep frying.
IMG_7693 IMG_7694
  • When the oil is hot, carefully put in the dried and sliced raw bananas.
  • Fry it in batches. Do not put too much at a time. Also carefully put them and ensure everyone is separate . If the raw banana slices are together then it will get cooked evenly and will become soggy.
  • When the sizzle sound of the oil subsides, take them out and drain it in a kitchen towel.
IMG_7695 IMG_7696
  • Repeat this for the rest of the slices.
  • Transfer it to a wide airtight container. Add pepper powder and chilli powder. Do not add salt as we added while immersing them in water.
  • Shake vigorously for even mixing of spices.
  • Enjoy crispy Vazhakkai chips with Rice and sambar or with tea | coffee.
vazhakkai chips
Note:
  • Just before frying take out the sliced raw bananas from water and pat dry. Else the color will become dull.
  • After frying and draining the excess oil in the kitchen towel, a minute later transfer it to a air tight container. Repeat this for all the batches . If the chips stays outside till the entire batch gets over it will loose its crispiness.
  • For a healthy version you can bake it instead of frying.
  • In my in laws place the cook mami will take out the skin of the vazhakkai ( as we do for ripe banana) and directly slice them in the oil. though i have seen that I never tried as i don't think i can bear the heat!!

  • Digg
  • Del.icio.us
  • StumbleUpon
  • Reddit
  • RSS

HOT CHOCOLATE RECIPE | HOME MADE HOT CHOCOLATE

     Though I am not a fan of chocolate, very rarely i get cravings for chocolates and few days back  suddenly i have a craving for some hot drink with chocolate i made this hot chocolate at home adapting the recipe from here. It tasted very yum and i thoroughly enjoyed it and sharing the recipe today.

This posted i drafted a few weeks back . As i was extremely busy with the kiddos exams and other routine work, couldn’t visit any of the blogs and missed all the super recipes. I will be back to routine from next week.

hot chocolate


INGREDIENTS:(  SINGLE SERVING)

COCOA POWDER 1 TBLSP
SUGAR 1 TBLSP
HOT WATER 1 TBLSP
LOW FAT MILK 1 CUP
SALT A PINCH
VANILLA ESSENCE 1/4 TSP

hot chocolate

METHOD:

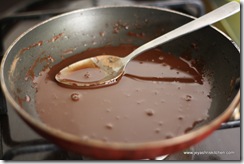
  • In a pan add the cocoa powder, sugar and salt along with hot water.
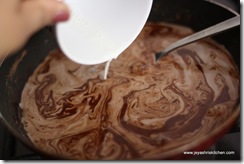
  • Slowly add the milk and bring it to a boil. Keep the flame low.
IMG_8283 IMG_8285
  • Remove from heat and add vanilla essence.
  • Whisk the mixture to make it frothy.

IMG_8292

  • Dust with some chocolate powder on the top if you want.

hot chocolate

The entire process can be done in Microwave too.

  • Digg
  • Del.icio.us
  • StumbleUpon
  • Reddit
  • RSS