
Paruppu podi we make generally without adding garlic. I have posted the recipe of paruppu podi HERE.
This recipe of andhra style paruppu podi | kandi podi, i learnt from my friend. I have already posted a Pottukadalai podi too. This podi was too flavourful. I didn't make it very spicy but if you want you can add extra few red chilly. This is a simple and quick podi recipe, taste divine when mixed with hot rice and ghee.
Ingredients 
Preparation Time :10 mins | Cooking Time :10 mins | Yields : 1 cup
Toor dal 1/2 cup
Black pepper 6
Red chilli 8
Roasted gram | pottukadalai 2 tblsp
Garlic 15 pods
Cumin seeds 1/2 tsp
Salt as needed
Oil 1 tsp
Toor dal 1/2 cup
Black pepper 6
Red chilli 8
Roasted gram | pottukadalai 2 tblsp
Garlic 15 pods
Cumin seeds 1/2 tsp
Salt as needed
Oil 1 tsp

Method:
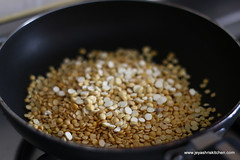
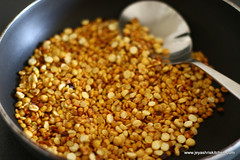
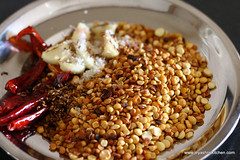
- In a pan add oil and roast the toor dal and roasted gram . Roast it in a low flame till it becomes golden brown color. Be careful not to get it burnt. Else it will spoil the taste.
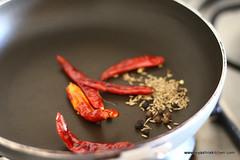
- Take it out and roast the red chilli, black pepper and cumin seeds. Roast them in a slow flame.

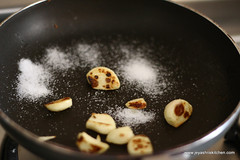
- Keep it aside and roast the garlic . Actually i added 7 garlic pods but after tasting i felt i needs some more to get the flavor. When the garlic gets roasted, add salt to this and switch off the flame.
- Allow everything to cool.
- Grind this into a fine powder. Garlic paruppu podi is ready.

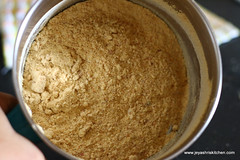
- Enjoy this paruppu podi with hot rice smeared with ghee.


0 komentar:
Posting Komentar